


Discussing the design of fountains and waterfalls with Catharine, an Internet friend, she commented
"Do you think you could make an "infinity" pool? I also adore those."
I didn't know what an "infinity pool" was. She explained it was a pool which ends in a weir, so has no wall at one end and has a clear view to the horizon.
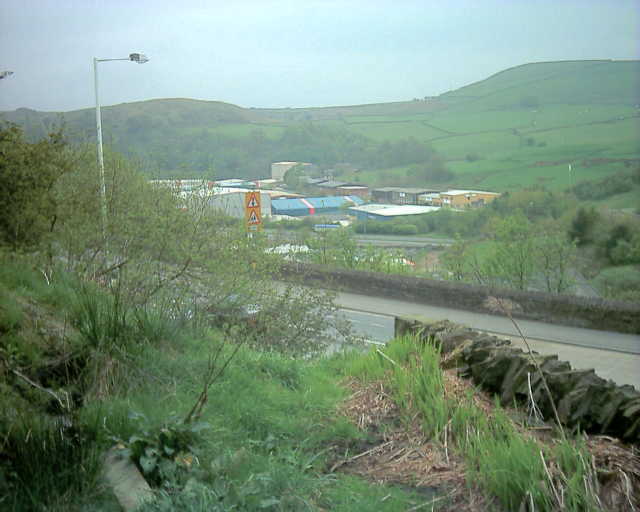
I thought about it. I liked the idea of a pond, I had always dreamed of attracting dragonflies to my garden, but no, I couldn't see how. You need to get a sightline from behind the pool to see the horizon over the weir, but whatever I build on street level backs up against the hillside. Now if I were on the other side of the road I would be looking out over the pool downhill and that might work. On the other hand, what has the road got to do with it, I need to think about building at the top of my land. That won't work either, the garden is topped by a line of hawthorn trees ( I suppose it once was a hedge but now they are 10m high) and the only way to get a long enough sightline would have to be along the hillside.
 Then I saw it! The top half of the garden is 6m above the back yard, separated by a cliff and dry-stone wall. I have been terracing this into level strips about 2m wide. The lowest terrace ends abruptly in a drop of about 1.5m, and if I dammed the end the view along the terrace would look over the pool, out down the main road and across the valley.
The uphill boundary was defined by a land drain I dug ten years ago, which had been smothered by silt. This made a foundation for a small dry-stone wall to hold back the mud. I defined the inner end arbitrarily as the line where the prospective water level intersected the existing ground. The downhill boundary was the inner side of the cliff wall. This I noticed for the first time sloped downward quite sharply, so its end capstone marked the maximum available water level. This stone weighs about 100kg, I know because one evening a large drunken man attempted to throw it from its normal position on top of the wall at a comrade below. That he managed to lift it at all was remarkable, I needed ropes to shift it from where it landed. He was lucky that it missed his toes as it fell almost vertically, gouging a path down the hillside.
Materials for dry-stone walling were conveniently to hand. Fifteen years ago I demolished a neighbour's derelict barn to use the stone for my terracing, The remains of my main stone dump was only a few metres uphill from my new project, and while all the heavy stuff was used up, there were plenty of bits left for these tiny walls
Dry-stone-walling continued around the open end to build a dam. The weir itself is two lengths of plastic guttering screwed together along their length to make an S section. The inverted section is inwards to form the lip of the weir, the outer section is a normal gutter and leads the run off water into a drainpipe, onwards and downwards. To get an even run-off this weir has to be extremely level, I used the water-level to get the top of the wall within a centimetre or two and finished off with packed earth.
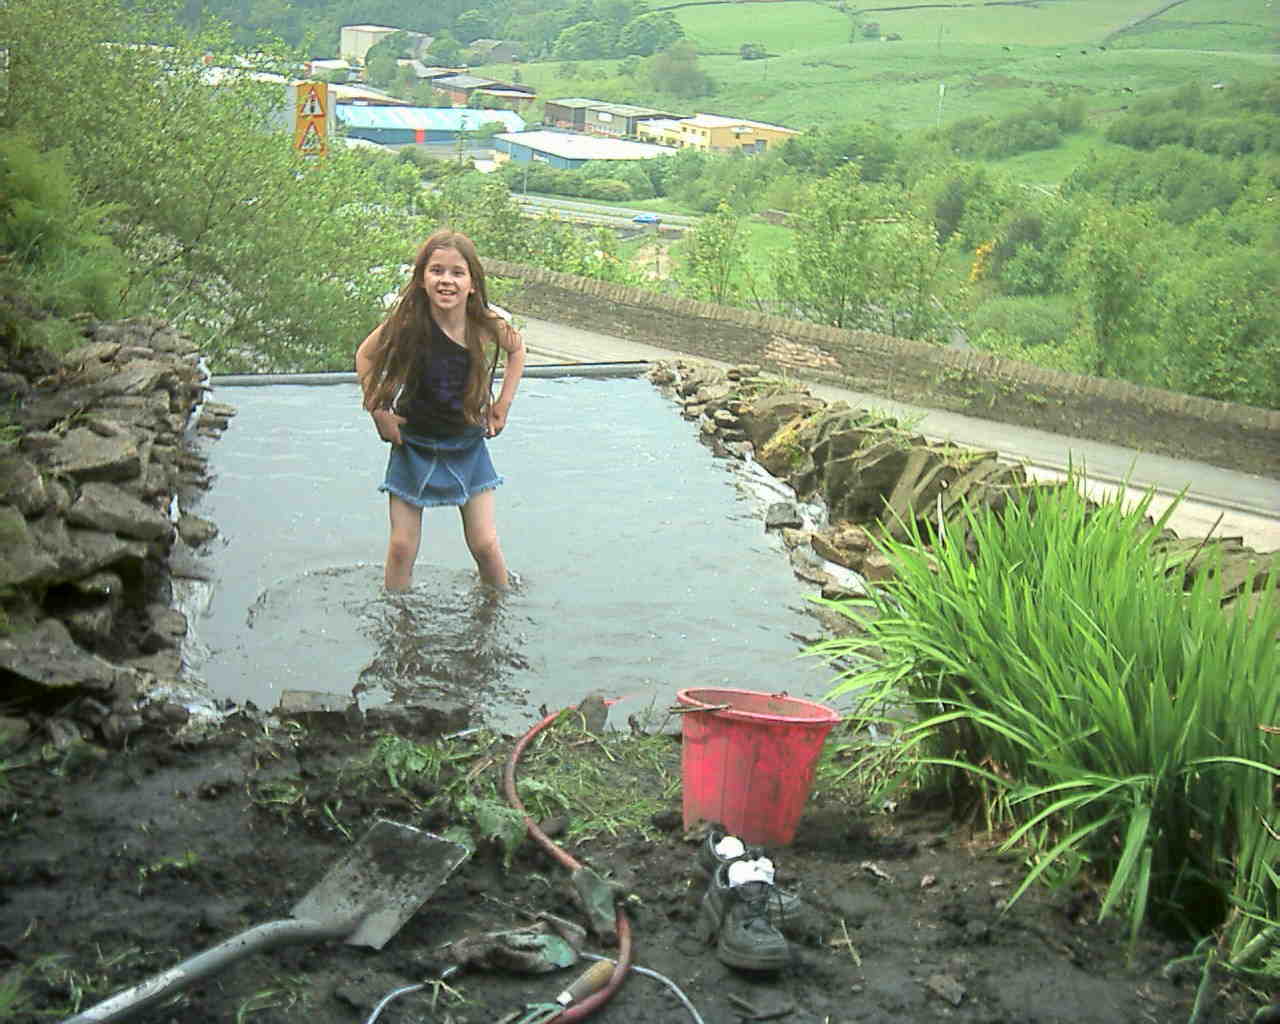
Now came the heavy work. Picking dry weekends between the spring showers I stripped off the vegetation, broke up and levelled the ground beneath, leaving until last the channels which captured the run off from the muddy bank. The final preparatory job was to rake out all the stones from the now well ploughed earth, to stamp it down and have Natasha go around with the water-level looking for high spots.
I had been reading up on pond design and soon realised that I had already strayed extensively from 'received wisdom'. It is not recommended to make ponds or waterfalls out of natural water flow at all. Ponds are supposed to be topped up by rainwater or tapwater, tightly sealed, pumped and filtered and if they are of any size, about 1m deep. Liners are made of strong expensive materials to ensure that leakage is kept to a minimum. This sort of pond is deep enough and warm enough to keep decorative Koi carp, which are glorified goldfish, and for lake-edge vegetation to thrive. Well I had no aim to keep fish or grow water-lilies, so that rather seemed to rule me out of the pond-building fraternity. However I did have an idea for a use for a 20cm deep cold pond, beyond silt interceptor for the spring water. I could sail on it! Not personally you understand, but by proxy, with a small radio controlled yacht.
 But back to the construction. Next I needed a water supply. I channelled the spring into the defunct drain which although covered over with mud still passed water happily, then dammed the channel with stone and mud to make a collection pool to feed into a hosepipe, which for now went straight back into the drain.
Still straying from accepted practice I laid down a cheap polythene groundsheet as a liner. I did 'splash out' on the heavy duty version, I think it cost about a tenth of the price of standard pond liner. I glued one end to the weir gutter. It blew around like a sail until I weighted it down with stones, this mayhem turned out to be a cause of problems later. My theory was that if the water was managing to stay in a mud-bottomed stream then it should not need much encouragement to stay in a pond. The silt was annoyingly good at blocking up my deliberate attempts to drain it, so I hoped to turn this to my advantage and have it block up any leaks in the liner. So without ceremony, in went the hosepipe.
 I had measured the flow down the pipe at about 5 litres/minute, and calculated the pond held 1000 litres, a ton of water. So the pond should fill in 200 minutes, say about 4 hours allowing for a little leakage. Everything seemed to be on schedule as the level rose to within 5cm of the top, but the next day the level was still the same. There were small tears in the liner just below the guttering where it had chafed while being windblown, and the water was running into the earth bank lining the dam and washing it through the dam wall. The theory of silting up was all well and good for the long term, but right now there was no silt in the pond and clean water was flowing out fast. I slapped some patches on the worst tears; the level rose another 2cm then stopped again. I had made earth banks topped with stones to hold down the liner and aligned them with the water level, but I had absent-mindedly set the tops of the stones to the surface, so the liner, pinned under the stones, was beginning to overflow all around.
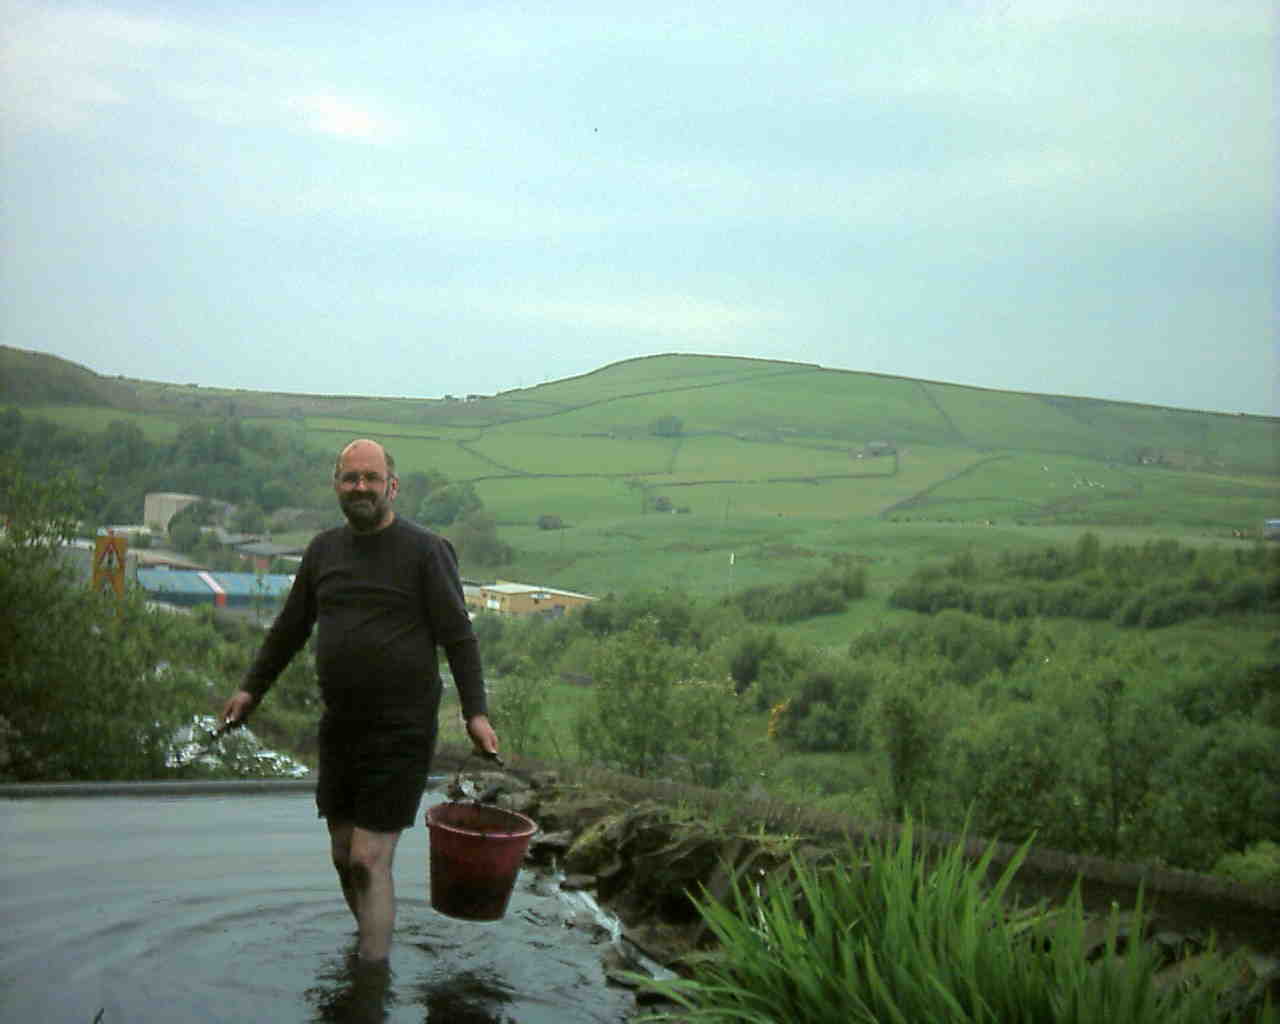
This called for wading around with a bucket of earth and building up the banks. That looked like fun so Natasha took time off digging her own mini-pond to have a go too.
Well it was cheap. Before laying another liner I dug a drain across the bottom of the pond to lower the water table and allow the gas to escape. The guttering I weighted down with stones. I gave up trying achieve an aesthetic finish by glueing the polythene under the gutter, and simply laid it, doubled under, atop the weir. This is much easier, it is inherently sealed and can easily be replaced if dislodged. The gas drain was a success too, in wet weather bubbles do begin to form, but they disappear again as soon as the next dry spell comes along. The intake sieve rusted away over the winter and has now been replaced with a heap of gravel - much more effective and reliable.
Dogs seem to be a rare hazard, I have not had any recurrence of that, but teenagers are less so. A lot of debris has been thrown in, and the liner was punctured with a steel spike. Leakage was immediately visible as an increased flow of water from the gas drain, but after cleaning up, the damage slowly sealed up as originally envisaged and flows returned to normal.
The design was finally defeated by something as simple as a broken wineglass. Vandals simply dragged the sharp edge along the bottom, completely shredding the liner, and the pond was empty again. Now it waits for plans for a concrete liner. I'd like to see them attack that with a wineglass.